

In this article, you’ll be guided to create your personal and own cloud service (similar to Google Drive, OneDrive, ecc.). You’ll go through all the setup of the online server, that will be used do install the NextCloud service that will be the system used to manage your cloud storage (for more information about NextCloud follow the link to the documentation).
You’ll be able to access to your stored file online easily and from all the main platforms (Windows, Linux, macOs, Android, iOS) using the compatible apps.
What do you need?
- Online server on hosting account (I used Oracle Cloud Free Tier) with Ubuntu or Debian based distribution (check here how to setup one)
- A PC with internet connection (windows, linux, macos, ecc.) with SSH support
- My article
- 30 minutes
After creating your instance, first thing to do is access to your remote machine.
Access your online instance and update
Using your system terminal (es. Windows use Command Prompt), access to your online instance using the following:
ssh -i path_to_private_key.pem ubuntu@your_public_ip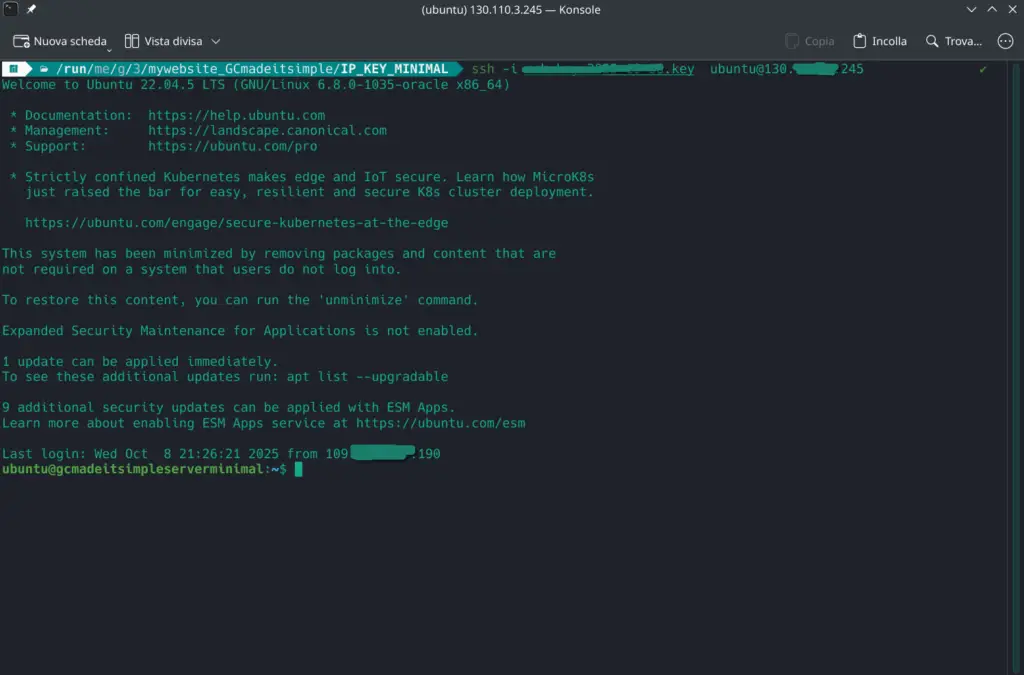
After access is complete let’s update and upgrade the Ubuntu installation and install some needed packages:
# Update and upgrade the system
sudo apt update && sudo apt upgrade -y

# Install packages
sudo apt install -y curl wget apt-transport-https ca-certificates gnupg lsb-release ufw
Install Docker and assign group
# Download and install docker
curl -fsSL https://get.docker.com -o get-docker.sh
sudo sh get-docker.sh

# Assign current user group
sudo usermod -aG docker $USER

# Reboot the system
sudo reboot
Install & Configure NextCloud
Now after reboot let’s create and configure the NextCloud container in Docker.
We are going to:
– Create the NextCloud folder
– Create the Docker compose file
– Compose NextCloud
– Setup firewall and Nginx Proxy to have HTTPS connection
– Initialize and configure NextCloud installation
Setup the folder environment
# Create nextcloud directory for container
sudo mkdir -p /opt/stacks/nextcloud

# Grant current user permissions
sudo chown $USER:$USER /opt/stacks/nextcloud

# Go into the folder created
cd /opt/stacks/nextcloud
Create & compose NextCloud in Docker
# Create the compose file:
nano docker-compose.yaml
Copy & Paste inside the new .yaml file and save:
version: "3.8"

services:
  nginx-proxy-manager:
    image: jc21/nginx-proxy-manager:latest
    container_name: nginx-proxy-manager
    restart: unless-stopped
    ports:
      - "80:80"      # HTTP → for initial certificate issuance and redirecting to HTTPS
      - "81:81"      # Admin UI for Nginx Proxy Manager
      - "443:443"    # HTTPS traffic
    volumes:
      - nginx_data:/data
      - letsencrypt:/etc/letsencrypt

  db:
    image: mariadb:11.3
    container_name: nextcloud-db
    restart: unless-stopped
    command:
      - "--transaction-isolation=READ-COMMITTED"
      - "--binlog-format=ROW"
      - "--innodb-file-per-table=1"
      - "--skip-name-resolve"
    environment:
      MARIADB_ROOT_PASSWORD: nextcloud_root
      MARIADB_DATABASE: nextcloud
      MARIADB_USER: nextcloud_user
      MARIADB_PASSWORD: nextcloud_db_pass
    volumes:
      - db_data:/var/lib/mysql

  nextcloud:
    image: nextcloud:latest
    container_name: nextcloud-app
    restart: unless-stopped
    depends_on:
      - db
    environment:
      MYSQL_PASSWORD: nextcloud_db_pass
      MYSQL_DATABASE: nextcloud
      MYSQL_USER: nextcloud_user
      MYSQL_HOST: db
    volumes:
      - nextcloud_data:/var/www/html

  watchtower:
    image: containrrr/watchtower:latest
    container_name: watchtower
    restart: unless-stopped
    volumes:
      - /var/run/docker.sock:/var/run/docker.sock
    environment:
      WATCHTOWER_CLEANUP: "true"
      WATCHTOWER_POLL_INTERVAL: "21600"  # poll every 6 hours

volumes:
  db_data:
  nextcloud_data:
  nginx_data:
  letsencrypt:
Compose and start the docker container:
cd /opt/stacks/nextcloud
docker compose up -d
Network setup
Setup firewall correctly, in order to open ports 80 (http), 443 (https), 81(http) for Nginx Proxy setup.
Note: if you’re using an online server check the network ingress ports settings.
# Reset IPTables and use ufw Firewall (Optional)
sudo iptables -F
sudo iptables -X
sudo iptables -t nat -F
sudo iptables -t nat -X
sudo iptables -t mangle -F
sudo iptables -t mangle -X

# Reset ufw and apply new firewall rules
sudo ufw reset
sudo ufw allow OpenSSH
sudo ufw allow 80/tcp
sudo ufw allow 81/tcp
sudo ufw allow 443/tcp
sudo ufw enable
sudo systemctl enable ufw
Grant HTTPS Connection
Access to Nginx Proxy manager in order to setup the HTTPS connection.
If you don’t have a domain I advise you to make one under the duckdns.org subdomain for free, or similar services, in this tutorial I’ll use this one.
Go into your web browser and on the top enter the following command in order to access Nginx Proxy Manager:
http://your_server_ip:81You’ll land into the Nginx proxy manager (more info in the documentation). At the first login you have to access with the default credentials and change at the first access.
# Default first time username and password
username: admin@example.com
password: changeme
After setting up an administration username and password in the guided wizard, you have to setup the domain and https security.
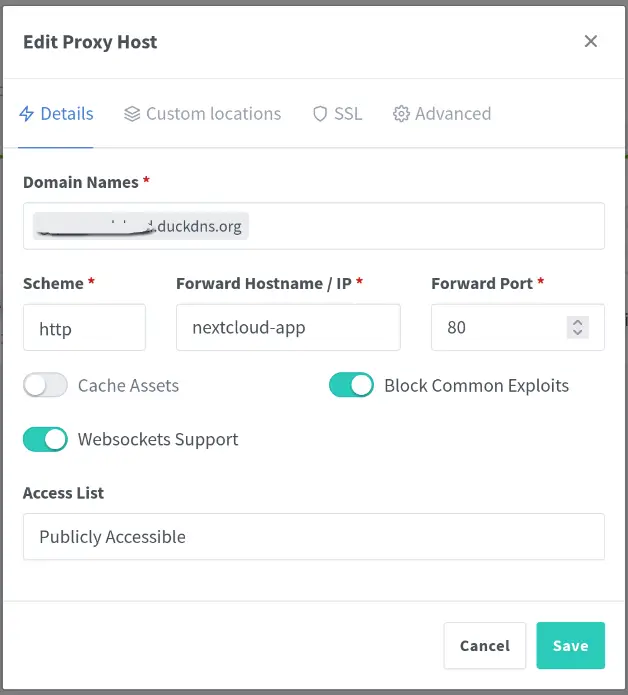
In order to do so go to … and create the new Proxy Host using:
- Domain Names: your_domain.duckdns.org (or wherever your domain is)
- Scheme: http
- Foward Hostname/IP: nextcloud-app
- Foward Port: 80
- Check: Block Common Exploits, Websockets Support
- Access List: Publicly Accessible
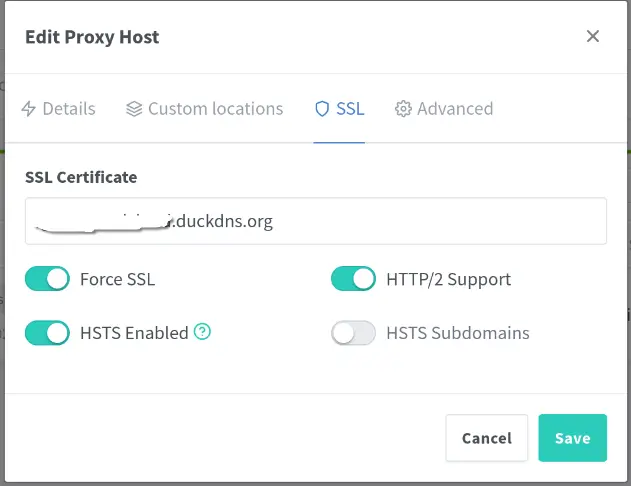
In the SSL tab insert:
- SSL Certificate: your_domain.duckdns.org
- Check: Force SSL, HTTP/2 Support, HSTS Enabled
At this point SAVE the settings.
All done and ready to go!
At this point run your container from the terminal:
# Run the NextCloud container
docker-compose up -d
Go to your website and access NextCloud from the domain you set (example your_domain.duckdns.org) to finish your wizard NextCloud Setup.

Enjoy! 😉